Event management is undoubtedly a great experience regardless of whether you are planning your own birthday party, corporate events, an event for family & friends, or any other type of event. But at the same time, it is the toughest task as numerous things have to be considered, especially when it comes to planning and managing any of the events successfully.
Many times after creating a successful event it becomes essential for the event organizers to manage it to leverage better results for their organized event. But when it comes to managing the event with event management solutions EventZ, the very first question they face is how to manage events in EventZ.
Here are a few steps to follow to create, manage, and remove events with EventZ.
The Ultimate Event Managing Guide: Explore to Know How to Manage Events with EventZ
The COVID-19 pandemic has undoubtedly affected numerous businesses. Recent figures show that 74% of influencers have posted organic content amid the pandemic, while 64% of influencers lost opportunities due to the pandemic. 88% of business entrepreneurs have agreed that the COVID-19 pandemic has impacted their earnings to a great extent. Hence it has become essential for them to organize and manage an event for their business to help them drive success and growth for their business.
87% of event marketers respond that they have canceled the events, while 66% have postponed their events due to the pandemic. At the same time, many entrepreneurs have shifted to online platforms and are organizing events online by managing them successfully with platforms such as EventZ.
There are numerous ways that can help businesses avoid skyrocketing costs and other horror hurdles that they face, especially when it comes to organizing and managing events online. You do not have to be a master planner or manager to successfully manage the event with an event management platform EventZ. There are some of the initial steps which you can take into consideration to manage the event successfully right from the tech stack from where you have created it. Learn the steps to know how to manage an event with EventZ.
Step to Follow to Manage Event Successfully with EventZ
Managing online or offline events is not rocket science for any of the event organizers, they can simply manage the event by following simple steps which are listed below. Explore to know how you can manage events with EventZ, and what steps you need to follow to manage it successfully on the platform after creating them successfully easily, and efficiently.
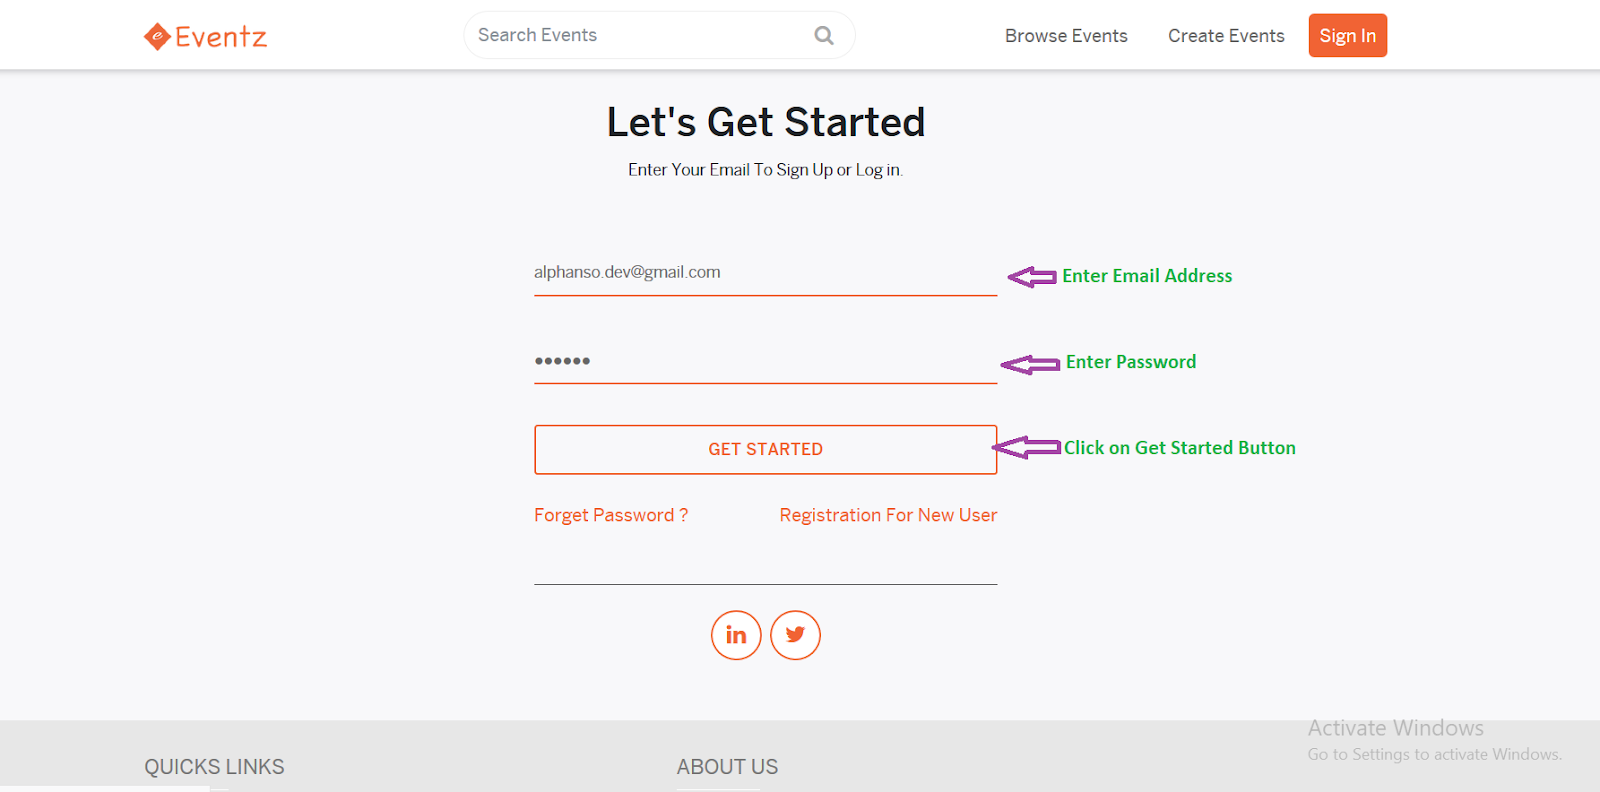
Step 1: Login Successfully to Platform
If you want to manage the event you have created previously, then the first step that has to be taken into consideration is to follow an easy login process. Enter your email and password, and you have registered yourself with the platform. After successful entry of email id and password, click on the login button to log in successfully to the EventZ platform.
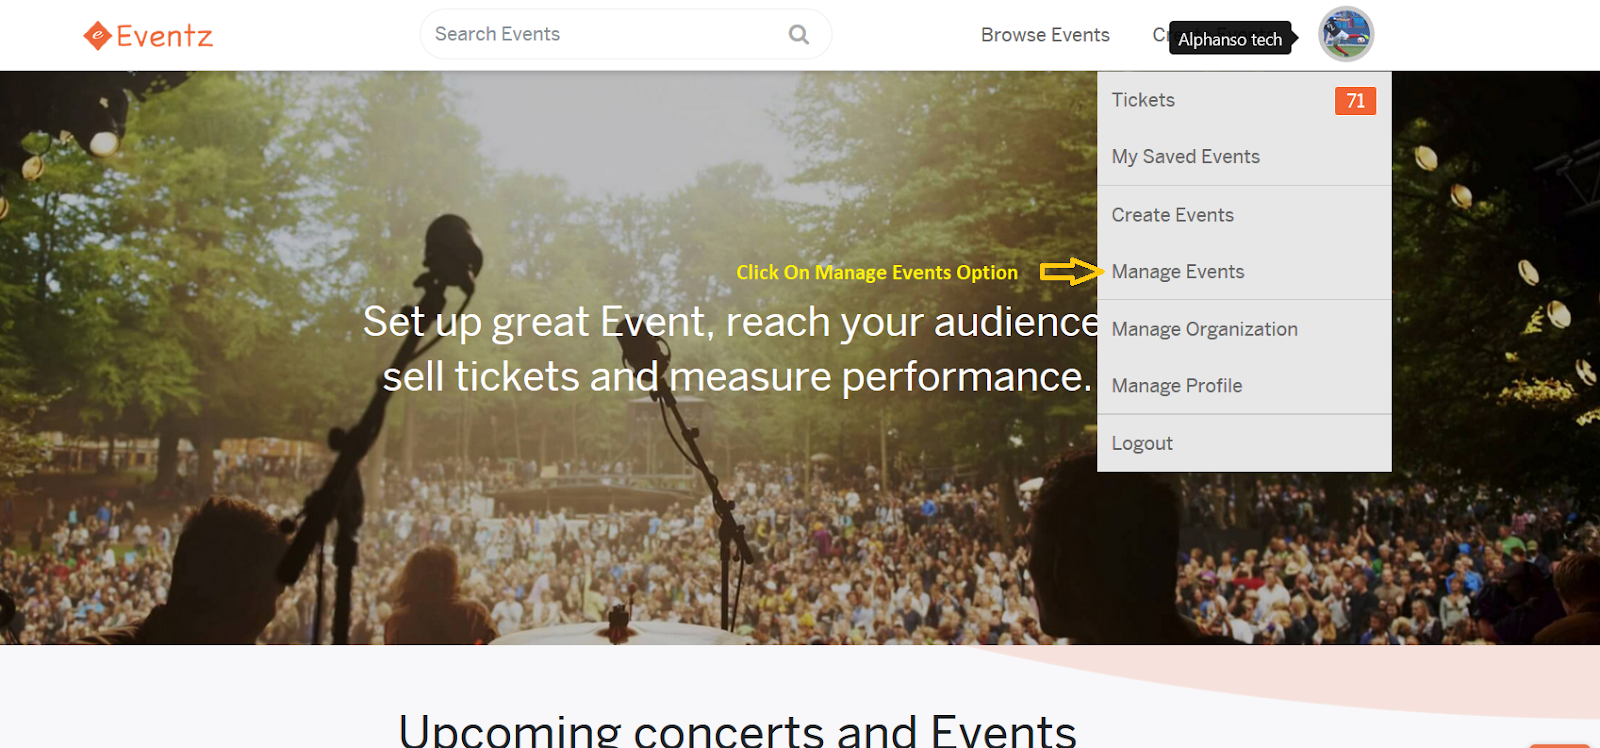
Step 2: Choose the Manage Event Option
After login successfully with the event management platform, it’s time to choose the right option. You can go to the scroll down the menu to choose the option of your choice. You can click on the manage events option once the menu pops up in front of your eyes.
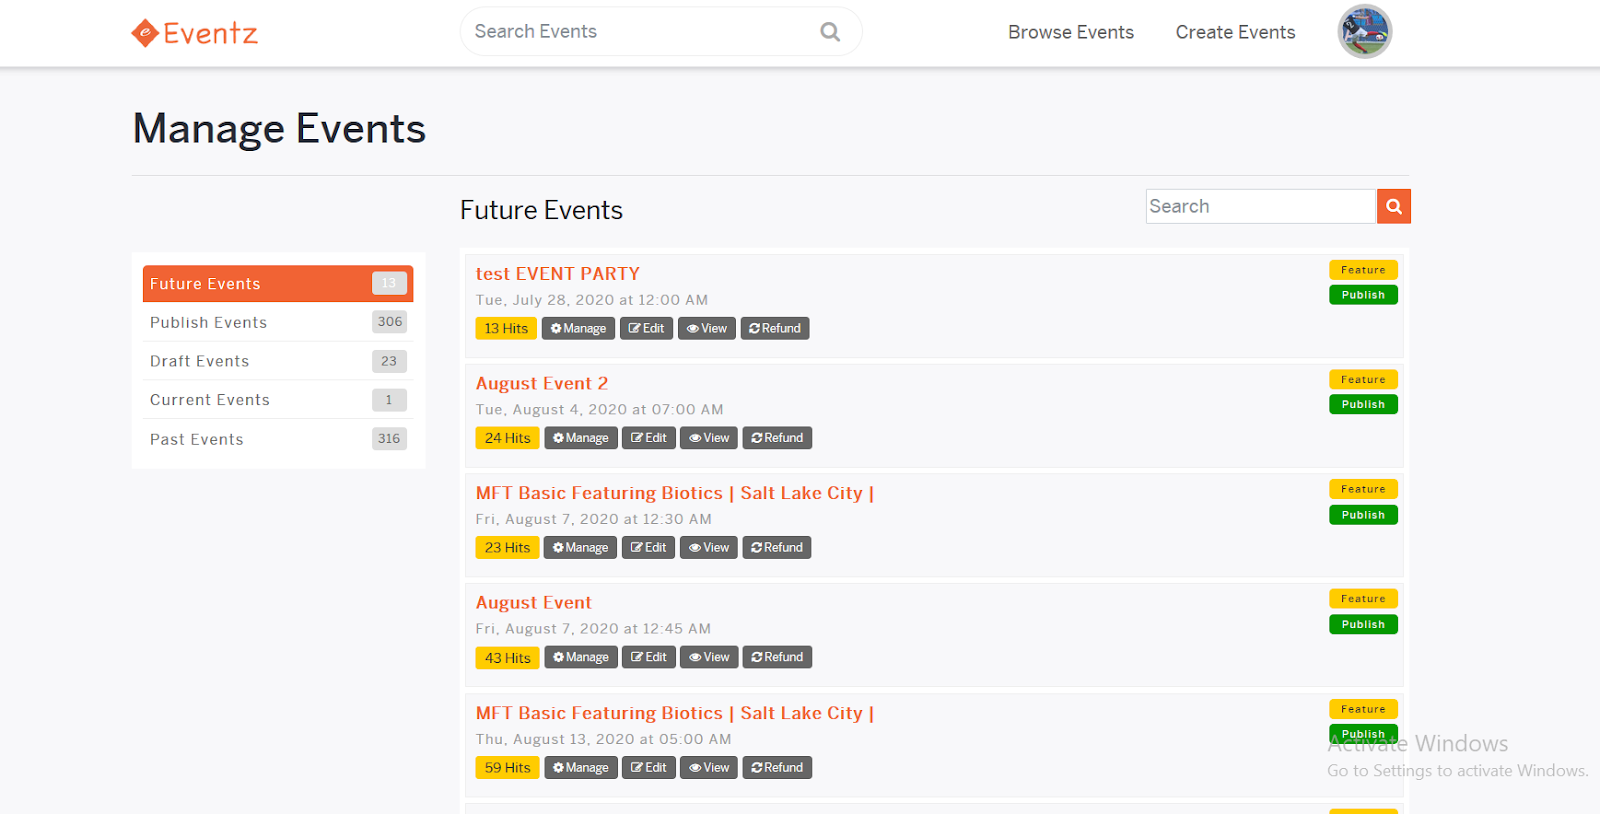
Step 3: Check the List of Events You Have Created
Once you click on the manage event option you can see the list of the event which you have created, these events are categorized as future events, publish events, draft events, current events, and past events. You are also provided with the number of hits, setting options, edit & view right, and delete options with every event which you have created using the platform.
Step 4: Click on the Manage Setting Option
If you want to manage your future event or any other event, click on the manage setting option, which is provided to you on the platform. Once you click on the option, you will be directly redirected to the event dashboard. Here you are allowed to check the number of tickets sold, the amount paid, sales made by ticket type, and much more.

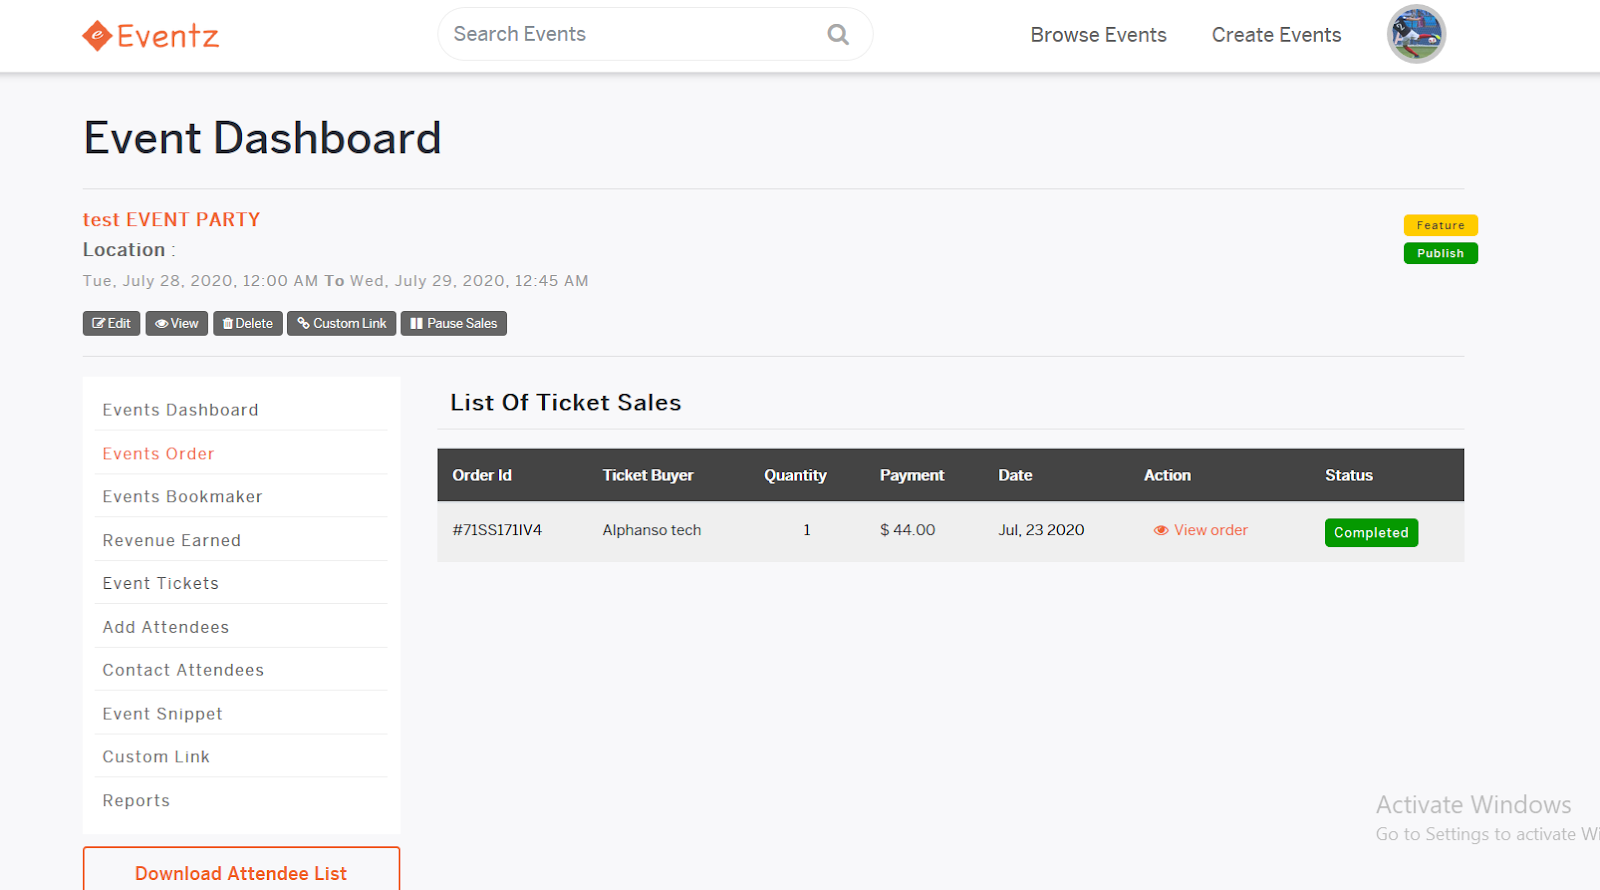
Step 5: Events Order
Once after exploring the information available on the event dashboard, you can click on events order to check the list of requests of the order and also check its status in the same process.
Step 6: Check the List of Bookmarked Events
Event managers are also allowed to check the list of bookmark events from the dashboard so that they can manage it efficiently as per their preference.

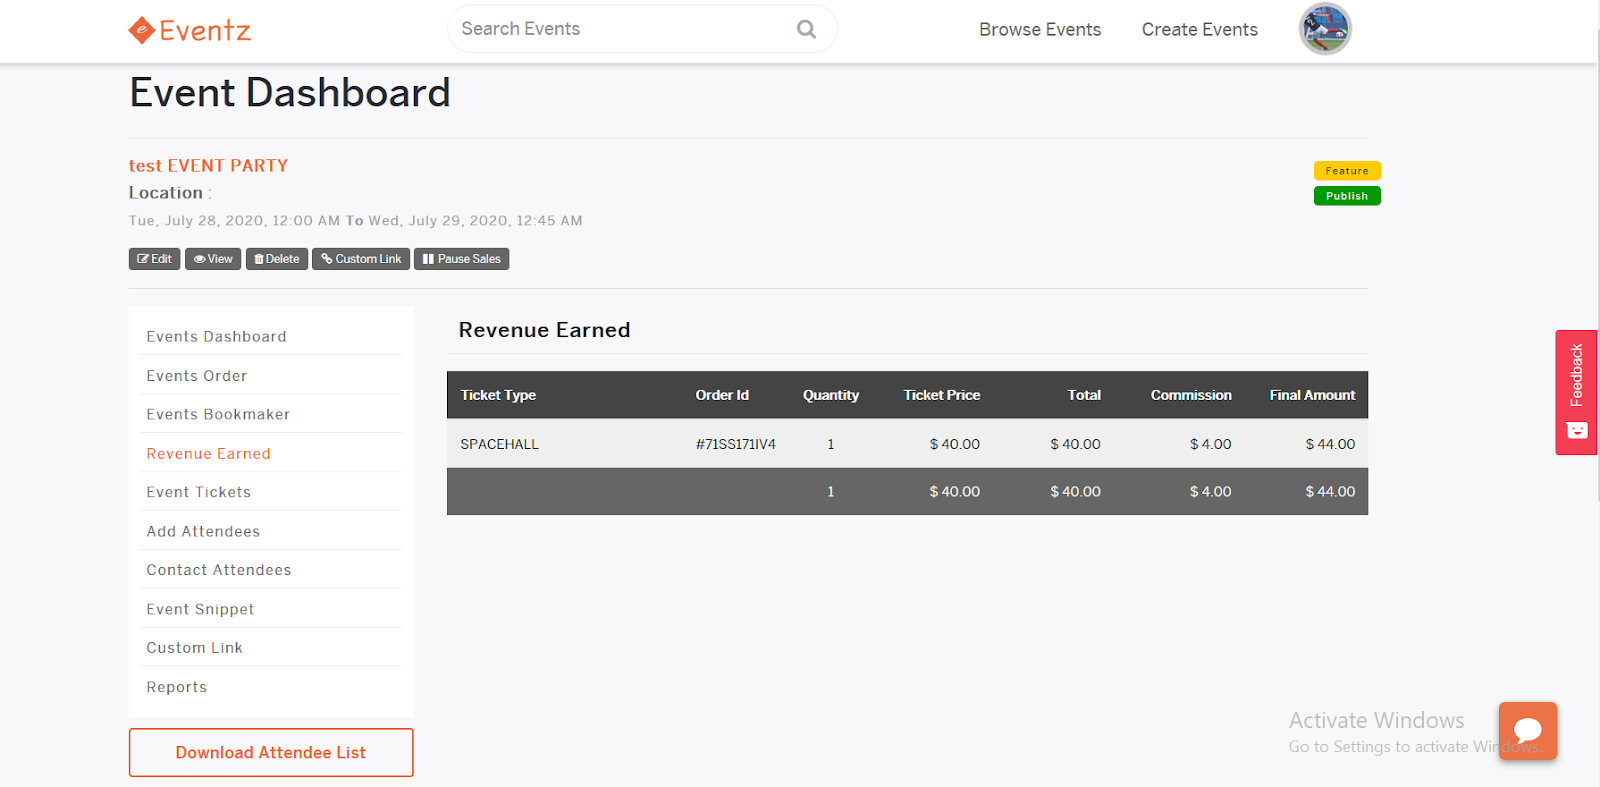
Step 7: Revenue Earned
The event organizer is allowed to check all the revenue earned details from the dashboard provided to them when they click on manage event options; this makes it easier for them to know how many tickets have been sold and what they have earned by organizing the event.
Step 8: Event Ticket
Event organizers are allowed to check event ticket details from the dashboard. They can check the order ID, ticket title, ticket code, username, and more with a refund option. They can even check whether an individual has attended the event or not.

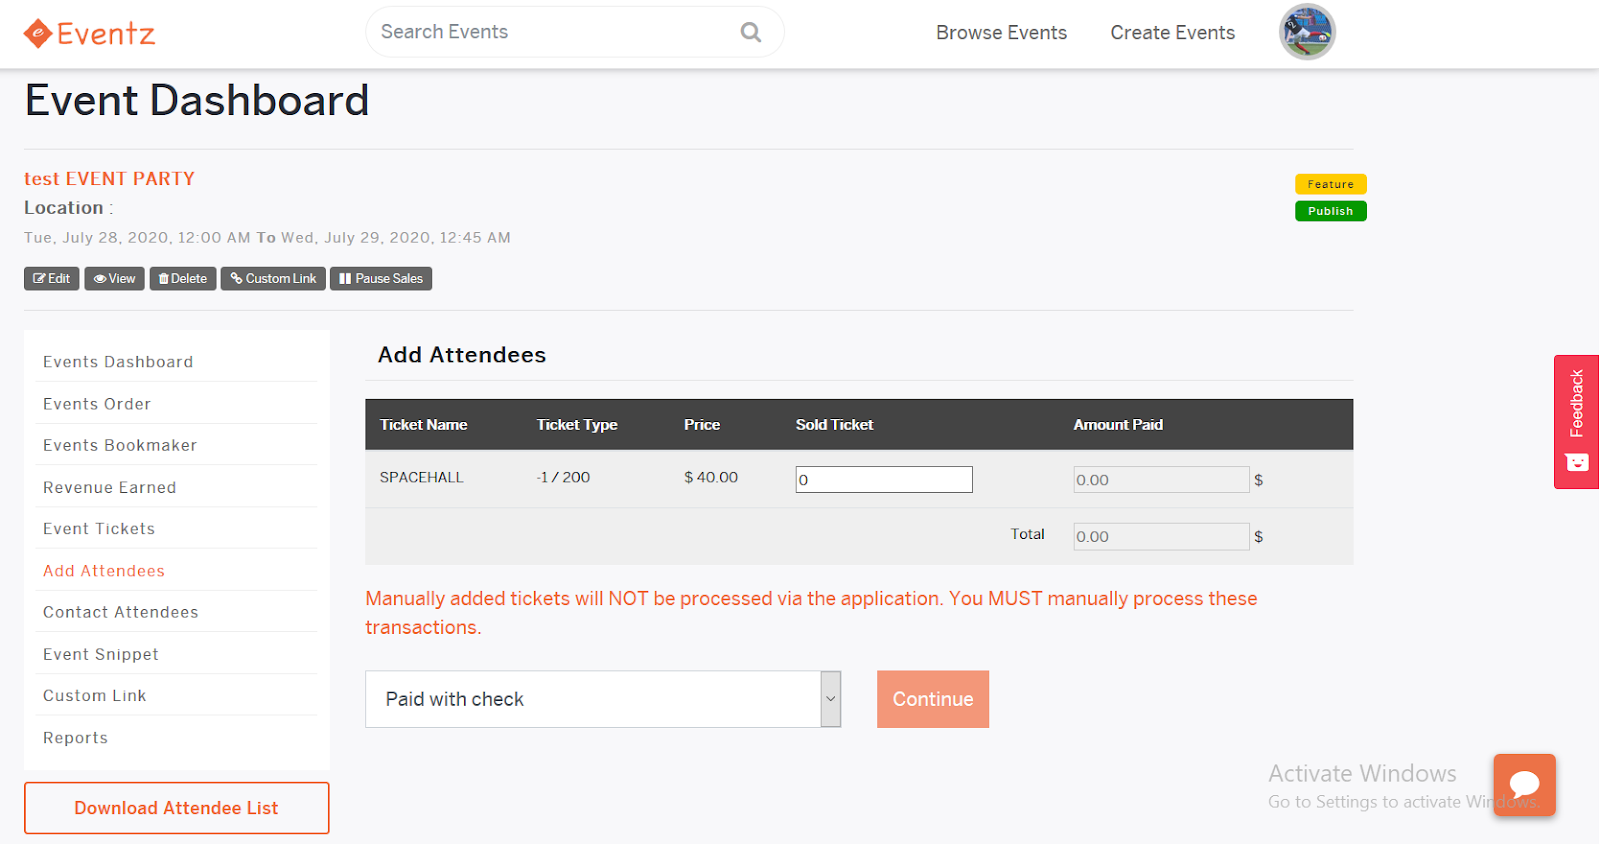
Step 9: Add Attendees
The event manager needs to follow a manual process to enter the attendees through the solution stack. There are various details that event organizers need to consider to add attendance to the audience; this detail includes ticket name, ticket type, price, number of tickets sold, and much more.
Once after entering all the details, they can add the mode of payment and click on the continue button to proceed to process further.
Step 10: Contact Attendees
The event organizer is allowed to contact attendees in case of any emergency. They can check order ID, full name, email, payment type, and much more to get attendees whenever they want right from the platform without any hassle.

Step 11: Event Snippet
The event manager is allowed to generate the event snippet, helping them market their event efficiently without any hassle. It ensures to drive more audiences for the event, encouraging it to make its next grand success with lesser efforts.

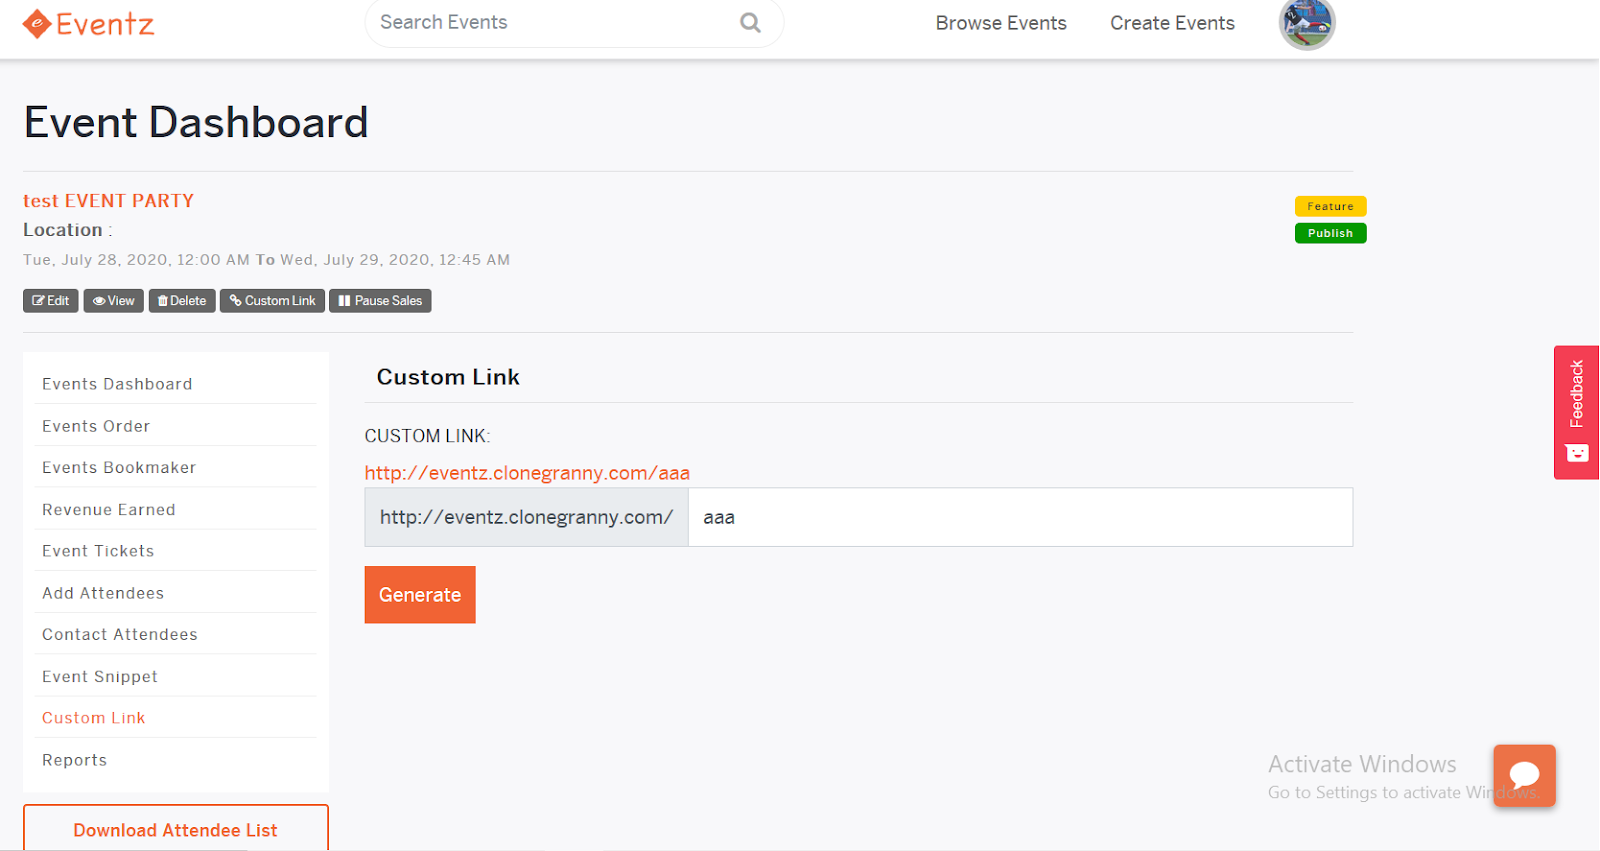
Step 12: Custom Line
The event organizer is allowed to add a custom line to their event as per their preference. This line helps them create a unique identity for their crafted event on the web, while it will also help them to make more customers know about their event so they can attend it and make it a grand success.
Step 13: Reports
The event organizer can explore the report tickets, orders, and scan logs to know everything about the event. This can help them have complete details about the event that they have created, ensuring their event’s success by planning it efficiently.

Step 14: Logout
Once after finalizing and exploring everything about the event you have created, you can log out successfully from the platform.

Concluding It Up
If you want to manage an event successfully, then it becomes essential for you to consider all the steps listed above. It’s quite easy for an event manager to create and manage events. They can take the support of a mobile app development company to develop an excellent event management app and website.